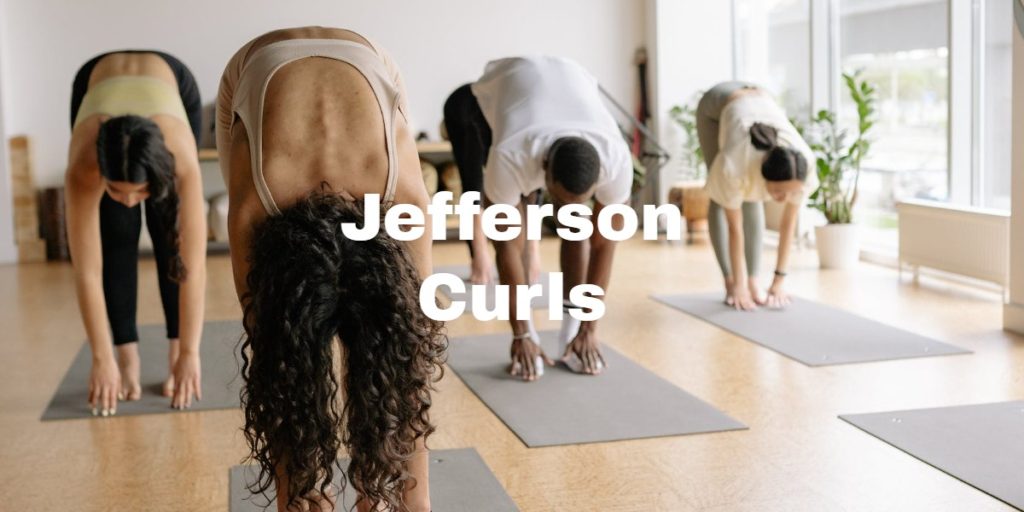
Jefferson Curls: Benefits And Stronger, More Flexible You
I have been working on my overall flexibility. It seems like it is something you just have to concentrate on as you age. Several years ago I head a Tim Ferriss podcast with former Olympic gymnastic coach and founder of Gymnastic Bodies, Christopher Sommer. One of the core parts of his routine was what he called “Jefferson Curls”. Since then I try and do Jefferson Curls on at least a weekly basis and I really try and do them every day to strengthen my lower back, improve hamstring flexibility, and have a spine that would make Gumby green with envy. I also sprinkle in other flexibility exercises like kitchen sink stretches, yoga flows, and dead hangs.
In this post, I am going to go give you a little of the history, benefits, proper technique, and my experience with incorporating it into my routine.
The Curly Origins: A Brief History
As with many great things in life, the Jefferson Curl has humble beginnings. This exercise was named after the third U.S. President, Thomas Jefferson, who supposedly used it to keep his wig looking fabulous (just kidding!). The Jefferson Curl (and Jefferson Lift), owes its moniker to the circus strongman, Charles Jefferson. He traveled and performed with Barnum and later with Barnum & Bailey. and was known for chain breaking and lifting extremely heavy weights.
Over the years, this unique exercise has been embraced by gymnasts, weightlifters, and weekend warrior types like us. Many fitness aficionados swear by its benefits. It may feel awkward initially, but you will eventually get the hang of it.
Jefferson Curl Benefits
Jefferson Curls have a lot of benefits. I have never been very flexible and I can tell the difference (in a bad way) if I string a couple of days together where I don’t do these. Here’s what you can expect when you incorporate them into your workout routine:
- Strengthens lower back muscles: These curls are like a warm embrace for your lower back, helping to build strength and resilience.
- Enhances hamstring flexibility: Say goodbye to those stiff-as-a-board legs, because these curls will have you feeling like a supple, bendy straw. There is a version of the Jefferson Curl that the knees over toes guy, Ben Patrick, uses for this reason.
- Improves core stability: Jefferson Curls aren’t just about the back—they’ll also challenge your core, ensuring your torso is as stable as a well-constructed Jenga tower.
- Increases spinal mobility: You might not think about your spine often, but it’s time to give it some love.
- Reduces the risk of injury: Let’s face it—no one wants to be sidelined due to a workout injury. By improving your flexibility and strength, Jefferson Curls can help keep you in the game.
- Promotes overall functional fitness: Like the cherry on top of a sundae, these curls bring all the benefits together to make you a more capable, flexible, and functional human being.
Proper Technique for Jefferson Curls
As with any exercise, mastering the Jefferson Curl is all about nailing the technique. Follow these steps to ensure you’re bending over backward (and forward) in style:
- Correct starting position: Stand tall with your feet hip-width apart, holding a lightweight (such as a kettlebell or dumbbell) in both hands. If you’re new to this exercise, you may even want to start without any weight to get a feel for the movement.
- Lowering phase: Take a deep breath in, and then slowly exhale as you hinge at the hips, allowing the weight to lower toward the ground. Keep your knees straight but not locked, and let your head and upper back round forward naturally. The goal is to feel a gentle stretch in your hamstrings without any pain or discomfort.
- Lifting phase: Inhale and engage your core as you slowly reverse the movement, stacking one vertebra at a time until you’re standing tall again. Keep the weight close to your body throughout the entire movement.
- Breathing technique: Remember to breathe! Exhale during the lowering phase and inhale during the lifting phase. Proper breathing helps maintain stability and control during the exercise.
Curl Commandments: Common Mistakes and How to Avoid Them
To get the most out of your Jefferson Curl experience, watch out for these common pitfalls:
- Going too heavy, too soon: Rome wasn’t built in a day, and neither will your perfect Jefferson Curl. Start with a light weight (or no weight at all) and gradually increase as you become more comfortable with the movement.
- Locking your knees: While you want to keep your legs straight, avoid locking your knees. This can put unnecessary stress on the joints and make the exercise less effective.
- Rushing the movement: Slow and steady wins the race! Take your time during both the lowering and lifting phases to ensure proper form and get the most out of the exercise.
How to Incorporate Jefferson Curls Workout Routine
Ready to make Jefferson Curls a staple in your fitness regimen? Follow these tips for optimal results:
- Frequency: Aim to include Jefferson Curls in your workout routine 2-3 times per week. This will help you build strength and flexibility without overdoing it.
- Reps and sets: Start with 3 sets of 8-10 reps, gradually increasing the weight as you become more comfortable with the movement.
- Complementary exercises: Pair Jefferson Curls with other exercises that target the posterior chain, such as deadlifts, glute bridges, and Romanian deadlifts. This will ensure a well-rounded and balanced workout that targets all of your lower body muscles.
- Progressions and modifications: As you advance in your fitness journey, you can challenge yourself by increasing the weight, adding pauses at the bottom of the movement, or performing the exercise on an elevated surface for a greater range of motion. For those with limited flexibility or previous injuries, consider modifying the movement by bending your knees slightly or using a lighter weight.
| Exercise | Sets | Reps | Rest (in minutes) |
|---|---|---|---|
| Warm-up (light cardio) | N/A | N/A | N/A |
| Jefferson Curls | 3 | 8-10 | 1-2 |
| Deadlifts | 3 | 8-10 | 2-3 |
| Glute Bridges | 3 | 12 | 1-2 |
| Romanian Deadlifts | 3 | 8-10 | 2-3 |
| Cool-down (stretching) | N/A | N/A | N/A |
Safety Considerations for Jefferson Curls
Before you jump headfirst into the world of Jefferson Curls, keep these safety tips in mind:
- Warm-up and stretching: As with any exercise, a proper warm-up is crucial to prevent injury. Make sure to engage in a dynamic warm-up that targets your lower body and includes some light stretching before diving into your Jefferson Curls.
- Potential risk factors: If you have a history of lower back issues or injuries, consult a professional before incorporating Jefferson Curls into your routine. They can provide guidance and modifications to ensure you stay safe and pain-free.
- Know when to consult a professional: If you’re ever unsure about your form or experience pain during the exercise, don’t hesitate to seek the advice of a fitness professional or physical therapist. They can help assess your movement and provide recommendations for improvement.
The Curling Conclusion
So there you have it, folks—a comprehensive guide to the world of Jefferson Curls. With their potential to strengthen your lower back, improve hamstring flexibility, and boost spinal mobility, there’s no reason not to give this exercise a try. It’s time to bend the rules and revolutionize your workout routine with Jefferson Curls.
Frequently Asked Questions
What muscles do Jefferson Curls target?
Jefferson Curls primarily target the lower back muscles, hamstrings, and core. They also help improve spinal mobility and overall functional fitness.
Are Jefferson Curls safe for people with lower back pain?
If you have a history of lower back issues or injuries, it’s best to consult a professional before incorporating Jefferson Curls into your routine. They can provide guidance and modifications to ensure you stay safe and pain-free.
How often should I perform Jefferson Curls?
Aim to include Jefferson Curls in your workout routine 2-3 times per week. This frequency will help you build strength and flexibility without overdoing it.
How much weight should I use for Jefferson Curls?
Start with a light weight or no weight at all to get a feel for the movement. As you become more comfortable with the exercise, gradually increase the weight while maintaining proper form.
Can beginners perform Jefferson Curls?
Yes, beginners can perform Jefferson Curls. It’s important to start with a light weight or no weight and focus on mastering the proper technique before progressing to heavier loads.

Troy Wallace
Troy Wallace is Certified Basketball Speed Specialist and shares his experiences in trying to stay as healthy as possible to stay on the court. He is active in coaching youth basketball in YMCA, Team Work Sports Nebraska, and, currently, in the Jr. Warriors program in Omaha, NE. Visit Troy's Full Author Bio Page or email him directly.
Meaningful conversations happening daily about training, recovery, and injury-specific rehabilitation as well as sport-specific discussions on playing, coaching and refereeing your favorite sport. We welcome experts and those with curious minds seeking answers.
Join The Stay On The Court Community!